How to work with Avast! Antivirus
Avast! Antivirus is a high quality free (for non-commercial users) security product that is in the upper tier of capability as far as its detection and removal capabilities as of April 2009. It does not include a firewall and has only limited anti-spyware features.
Like most Antivirus products, it has a somewhat idiosyncratic user interface. Unlike, say, Word Processing programs, where every one of them tends to look alike, Antivirus programs just haven’t gotten around to making a standard-looking interface. Still, Avast! is one of the stranger possibilities.
In the world of Antivirus (hereon abbreviated as AV) software, there are three well-known products that offer free-for-non-commercial-use packages: AVG from Grisoft.com, Avira from Avira.com and Avast! from Avast.com.
I have deemed AVG to be unacceptable overall at this point. It provides reasonable levels of AV protection, on par with most other commercial programs that I also deem unacceptable, such as Mcaffee or Norton products. However, it has in its most current version also taken on the “heavyweight” characteristics of those programs. In particular, add-ons it installs to web browsers seem to drag on speed of internet access. In addition, AVG version 8 has had at least one bug that was capable of hosing an entire Windows installation. As a result I no longer recommend AVG.
Avira is a perfectly serviceable free AV package that excels and is in all likelihood superior to Avast! in virus removal, but which continually nags users to buy the full, commercial version. It is this characteristic alone that makes me unwilling to recommend Avira over and above Avast!.
With this background information in place, let us discuss Avast! in more detai.
Obtaining and Installing Avast! Home Edition
Avast! Home Edition can be found at Avast.com or at Download.com. The version available at Download.com might not be the very same as the latest version from Avast!.com, but it does seem to be generally faster to download.
Download.com users should search for “Avast! Home” to find the most recent version.
In either case, the downloaded file will be called setupeng.exe. The version I downloaded today is approximately 30MB. Once the file is finished downloading, go ahead and run the setup file.

A progress bar will appear. Rather than fill in, this bar will traverse back and forth across its window.
Windows users of all sorts should be familiar with the process of installing software. There are no particular tricks to this installation. Click the Next button several times and eventually the installation will complete. Of course, this is also something of a bad habit. Windows users should also know that they could be agreeing to install spyware, or idiotic browser toolbars, or rootkits, or anything else for that matter.
Avast! will install and run on any 32-bit version of Windows. See that?
System requirements: 486
CPU, 32MB RAM. The requirements go up but are essentially the minimum
requirements for each version of Windows. The Read Me window also
describes the
Virus detection database Avast! uses as its VRDB,
the first bit of Avast!-specific terminology, and notes that like many
AV
programs, it requires a functional version of Internet Explorer to
download
updates. Click Next to continue on.

Now the
license agreement. As
things go, it’s pretty typical and boring. You will need to manually
choose I agree (as I have already
done in my
screen shot) and then click the Next button to continue.

Next!
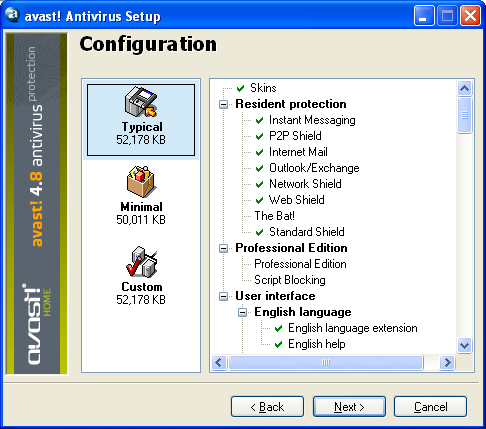
As you can see, the difference between a full installation and a “minimal” one amounts to 2MB. The optional component is “Skins”, which can change program appearance. Personally, I dislike skins, as they can move buttons and other screen components around and make it difficult to give proper instructions to users, but they’re part of the default installation. There is a repository of different Skins for Avast! on its web site, some of which are decidedly less horrible than the default one.
One of the major differences between the commercial and non-commercial versions of Avast! is the Script Blocking feature, which scans for malicious Javascript attacks, a very common vector for malware infections.
As an aside, The Bat! is an E-mail program that is more popular in Europe than the USA for which Avast! does not seem to offer resident scanning.
Avast! does explicitly scan P2P downloads from programs like Limewire, which many AV products do not.
Click Next to continue.
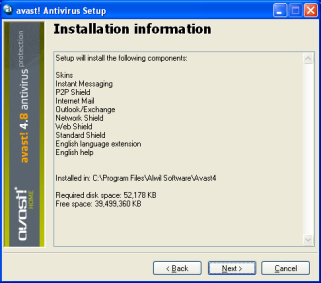
This is the usual installation summary. Click Next to continue.

… and the installation progress bar. Very typical. It will eventually lead to...
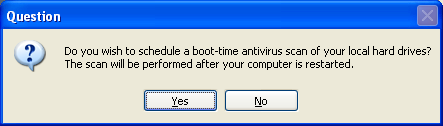
this prompt. OK. This is where instructions might diverge a bit. IF you suspect your PC of having a virus infection that needs to be dealt with immediately, or if you are unsure of the past status of virus protection on the PC, you should click Yes at this point. The next time the PC is rebooted, it will go through a scan of all files on all drives locally attached to the computer. This scan can take anywhere from 20 minutes to as long as twelve hours.
On the other hand, a new PC, or a PC which has had functional, up-to-date AV software that is no misbehaving, can probably get away without doing this scan.
It is probably safer to choose to do the boot scan rather than not.
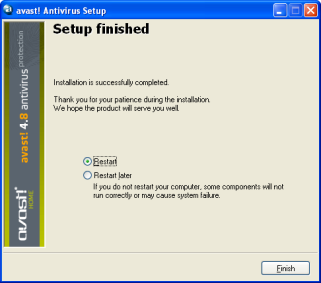
Setup is now complete. HOWEVER, if you chose to do the boot-time scan, there is another important step to this process. It is best for boot-scanners to choose to Restart Later before clicking Finish.
In either case, users will have to click Finish; the computer will ultimately have to be restarted before Avast! will begin to function.
The issue is that the downloaded setup file for Avast! almost never includes the most current set of virus definitions. Scanning with anything other than the latest virus updates is somewhat counter-productive; viruses change on a daily basis. AV software needs to do this also.
Therefore, it’s a good idea to obtain and install the latest VRDB (antivirus database) for Avast! so that it can work from the most current one from the first moment it operates at all.
Avast.com offers a single file which contains the most recent VRDB version. This file is called vpsupd.exe and is more than 20MB. The downloadable version of the update file can be found at http://www.avast.com/eng/updates.html. This file is very useful; for example a person with a slow internet connection at home and a fast one at work could download and copy the file to a thumb drive or a CD-R and update their PC without using Avast!’s built-in updater. It’s also very useful for computers that are already infected with Malware. It is very common for Malware programs to out-and-out disable AV programs and/or connections to web sites for Antivirus software vendors.
When the file download finishes, go ahead and run vpsupd.exe on your computer with Avast! installed.
You’ll get a progress bar for several seconds or possibly even a few minutes, depending on the speed of your PC.
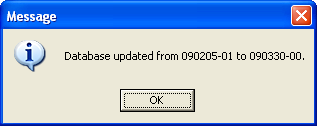
Eventually you’ll get a message that indicates that the Avast! database has been updated. The database is named in YYMMDD format, so my computer went from the February 5 2009 version to the March 30 2009. In computer security terms, that’s an eternity of updates!
Registering Avast! Home Edition
When a computer with an unregistered copy of Avast! Home Edition is restarted, this message is displayed.

Avast! will run for 60 days without registration. After that, it will no longer download updates automatically. Avast! will run for a total of 14 months from the date of its installation if it is registered. Registration is free and generally painless. Users do have to submit their E-mail address, but the company that makes Avast! only uses it to send out registration notices.
Users can get to the registration web site several different ways. They can click on the “avast! Home Registration page” link, which will open the site in their default web browser.
Users can also choose to visit Avast.com, mouse over the Support link at the top of the page, then choose “Free avast! Home Registration”
At the moment, the direct address for the registration page is http://www.avast.com/eng/home-registration.php
Because the registration does rely on
E-mail, the top of the
page includes a general admonishment to remove register@register.avast.com
from
Spam Blacklists, or to white list that sender if necessary. These
settings are completely dependent on the E-mail provider and user’s
individual preferences.
The
actual registration looks
like this:
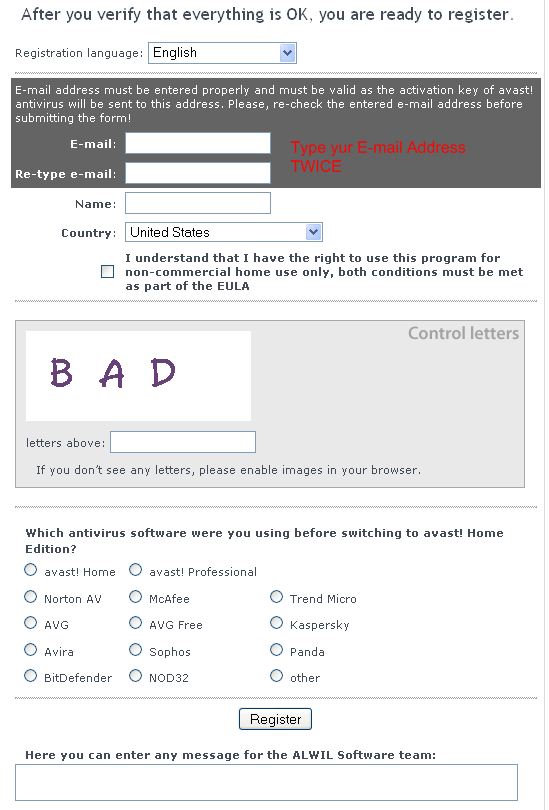
Since I have watched many people do this registration, I’m just going to point out that the registration is asking for the same E-mail address twice, and not an E-mail address and a password. Also, the CAPTCHA (labeled Control Letters) is not case sensitive.
The rest of the registration is optional and does not impact the registration in any way. Click the Register button to finish registration.
Usually, the E-mail containing the rest of the registration information arrives very quickly. If it’s not present in your inbox within five minutes, you might need to check your anti-spam settings or re-register using a different E-mail address.
The E-mail actually includes a unique license key and directions for how to complete the registration process, even going so far as to offer streaming video of the process.
Once the OK button from the “Welcome to Avast! Home Edition” window is clicked, two new icons will appear in your system tray, the area on your taskbar that most typically includes a clock.
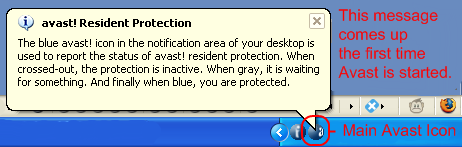
The registration message refers to
the main Avast! icon as
the spinning  “a-ball.” The icon next to it in my
screen shot does
not spin, but is still part of the Avast! program. The “i-ball”
“a-ball.” The icon next to it in my
screen shot does
not spin, but is still part of the Avast! program. The “i-ball”  indicates
that Avast! is capable of repairing files that have been infected with
viruses,
while the a-ball denotes the virus scanning features of Avast!
antivirus.
According to Avast!’s documentation, the i-ball part
of the program tracks changes to files for up to three revisions, in
case of
virus infection.
indicates
that Avast! is capable of repairing files that have been infected with
viruses,
while the a-ball denotes the virus scanning features of Avast!
antivirus.
According to Avast!’s documentation, the i-ball part
of the program tracks changes to files for up to three revisions, in
case of
virus infection.
I usually right-click on
the i-ball and
choose “Merge with main avast! icon” on the context menu, just so that
it isn’t
cluttering up my tray.
At any rate, to complete Avast!
registration, right click on
the a-ball and
choose
“About avast!...” from the context menu.
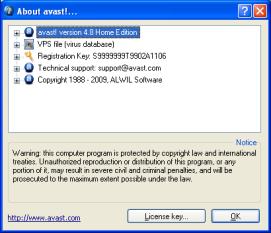
Then click the License key button…

… and copy/paste in the license key you were E-mailed. Or type it in. Whatever. I blurred mine out, since the Avast! license agreement technically does say that each key is good for one installation. Click the OK button.

Avast! is now registered and will receive updates for 14 months.
To operate Avast to perform a scan or to change user options, right click the a-ball icon and choose “Start avast! Antivirus from the context menu. A splash screen will appear, and Avast! will run a test for viruses in memory.

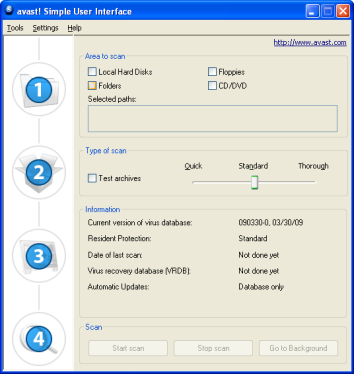
This memory test can take several seconds or minutes depending on the computer. Eventually, Avast!’s main user interface will load. It is not very user friendly.

The three icons on the right side of the screen, from top to bottom, represent different types of active scans a user could perform, where an active scan examines every file possible for viruses, rather than resident scanning, which merely scans files as they are used by the PC.
The button on the top right  represents
a scan of the computer’s hard disk
drives. It does not scan network drives, flash drives or optical media.
represents
a scan of the computer’s hard disk
drives. It does not scan network drives, flash drives or optical media.
The button in the middle
right  scans
removable media such as optical discs (CDs, DVDs, BDs, whatever),
floppies or
thumb drives.
scans
removable media such as optical discs (CDs, DVDs, BDs, whatever),
floppies or
thumb drives.
The button on the lower
right  indicates
that the user wants to do a custom
scan of specific folders. The custom scan can include network drives or
target
folders likely to include virus-infected files, such as a user’s
default web
browser download folder. Choosing this icon brings up a list of drives
and folders
to choose from, which checkboxes next to each of them.
indicates
that the user wants to do a custom
scan of specific folders. The custom scan can include network drives or
target
folders likely to include virus-infected files, such as a user’s
default web
browser download folder. Choosing this icon brings up a list of drives
and folders
to choose from, which checkboxes next to each of them.
In any case, as scan locations are chosen, the main Avast! window updates to indicate the specifics of the scan that will be done.
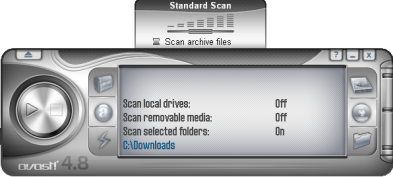
In this case I have chosen to do a custom scan of my C:\Downloads folder and to look moderately deeply at archive files (.zip, .cab, .rar, .7z, .tgz et al.) that might be nested inside other archive files.
When I am ready to begin my active
scan, I hit the Play
button  on
the far left side of the window to start my scan.
on
the far left side of the window to start my scan.

As you can see, the Play button turns
a Pause button  during
scans.
during
scans.
The Home version of Avast does not include an option to schedule scans. That is a feature of the Professional product. In theory, this is not a big deal; once a full virus scan is done, and assuming that Avast! is always running thereafter, there should not be any viruses present on the computer.
The other icons on the main Avast! screen, the ones to the left of the status window are:
 This
icon launches the Virus Chest. The Chest is where virus infected files
are put
by Avast! so that they cannot harm a computer. In the Chest, users can
delete
infected files or attempt to restore a file to an uninfected version.
Note that
for many file types this may not be possible; it’s most helpful for
Microsoft
Office-type files.
This
icon launches the Virus Chest. The Chest is where virus infected files
are put
by Avast! so that they cannot harm a computer. In the Chest, users can
delete
infected files or attempt to restore a file to an uninfected version.
Note that
for many file types this may not be possible; it’s most helpful for
Microsoft
Office-type files.
 This
icon allows the user to set the sensitivity of the Avast! resident
scanner (the
“a-ball”). Setting the sensitivity to a very high setting is more
likely to
prevent viruses but also more likely to cause false alarms and
inconvenience.
This
icon allows the user to set the sensitivity of the Avast! resident
scanner (the
“a-ball”). Setting the sensitivity to a very high setting is more
likely to
prevent viruses but also more likely to cause false alarms and
inconvenience.
 Clicking
this button causes Avast! to download
any available updates immediately.
Clicking
this button causes Avast! to download
any available updates immediately.
These buttons handle all the normal functions of an Antivirus program.
In addition, there is a small button
in the upper-left
corner of the Avast! main program window, that looks like an
upward-pointing
triangle. This
button  is
the
Menu button. Many of the Menu features duplicate the buttons that have
already
been discussed, or are only available in the professional version of
Avast!,
but the second choice from the top, Settings, is very interesting.
is
the
Menu button. Many of the Menu features duplicate the buttons that have
already
been discussed, or are only available in the professional version of
Avast!,
but the second choice from the top, Settings, is very interesting.
Settings can also be found by right-clicking the a-ball and choosing Program Settings from the context menu.
Most AVast! settings are fairly typical and common to most if not all Antivirus software. I would like to point out a few important settings, though.
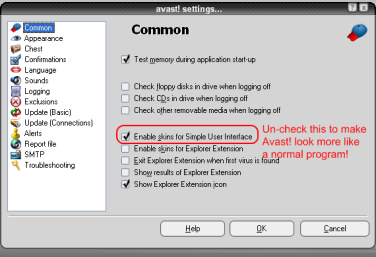
In the Common settings area, un-checking “Enable skins for Simple User Inferface” makes Avast! look more like a normal Windows program, instead of something not unlike a brushed-metal VCR.
Under Sounds, I strongly prefer to check the box for “Disable avast! sounds.” Avast likes tell you that it has updated, out loud and in English. I find this a little bit creepy.
Also, under Troubleshooting, I like to turn on (check) the setting for “Check for full-screen applications (e.g. games) before displaying pop-ups” and on a slow PC I might also tick the box for “Delay loading of avast! services after other system services”, but only on a PC I know not to be infected already.
What Does "Simple" Avast! Look Like?
All the same stuff as the “skinned” version, with the menus properly broken up into a menu bar, and in a much more self-explanatory format. I have no idea why this is not a default.
How Do I Do a Boot-time Scan Like the One I Did When I First Installed Avast!?
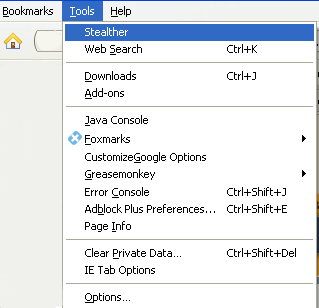
It’s really easy. Start the main Avast! program from the a-ball icon in the system tray, then click on the menu icon (or just the plain old Tools menu, if you’re using simple Avast!)
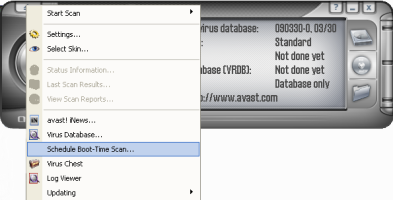
Or (see this “or?” This is why I said I hate skins up at the beginning of this document)
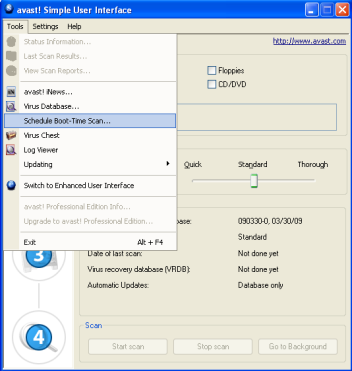
Choose “Schedule Boot-Time Scan…”
Then set your desired options. The advanced options let users pick default actions for when infected files are found. Files can be deleted or moved to the Chest, for example. As a technician I normally just delete them.
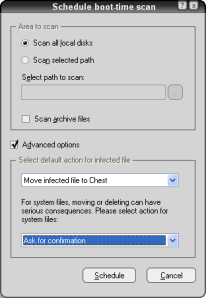
Clicking the Schedule button at this point will cause Avast! to run before Windows starts the next time your PC is rebooted.